Crispy Skin Chicken Thighs Basted in Butter (Cast-Iron Perfect)
Some nights I want steak. Some nights I want ribs. But on most busy nights, I reach for crispy skin chicken thighs basted in butter.
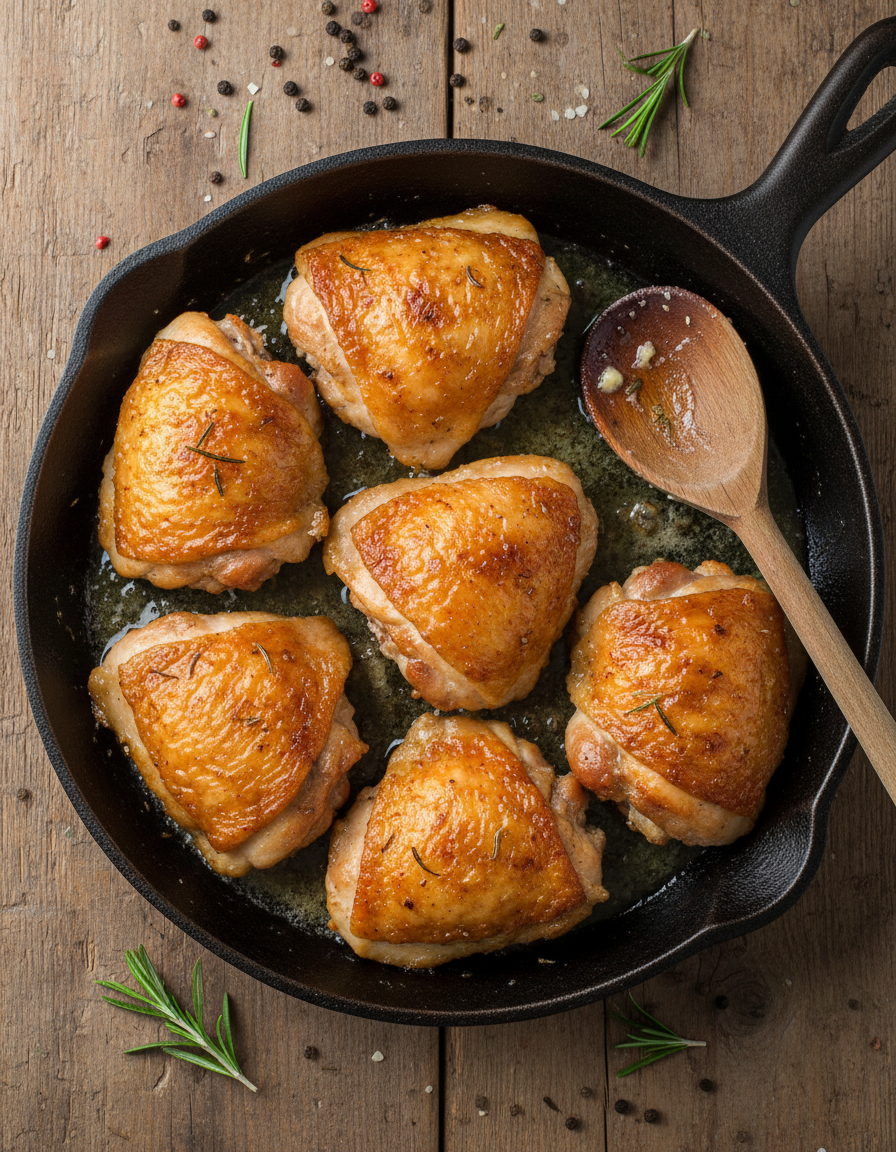
This is my easy comfort plate. The skin turns glassy and crisp. The meat stays juicy. The butter pools in the pan and turns into pure gold that you spoon over the top. It looks fancy, but it is simple enough for a tired weeknight.
I am Rhys Wilder, the meat nerd behind Carnicraft, and I make this at least once a week. If you like simple, rich food that fits the carnivore life, these thighs will earn a spot in your regular rotation.
Prep time: 10 minutes
Cook time: 25 to 30 minutes
Total time: 35 to 40 minutes
Servings: 3 to 4
Main ingredients: Chicken thighs, butter, salt, animal fat for the pan
Ingredients

- 4 chicken thighs, skin on, bone in, about 6 to 8 ounces each
- 3 tablespoons butter, plus 1 extra tablespoon for serving
- 1 tablespoon beef tallow, chicken fat, or duck fat for the pan
- 1 and one half teaspoons fine sea salt, divided
That is it. Simple and pure. You can add other spices if you live more animal based than strict carnivore, but I like the clean taste of meat, fat, and salt.
Instructions
- Dry the chickenPat the chicken thighs very dry with paper towels.
The drier the skin, the crisper it will get. Take your time here. - Season with salt. Sprinkle the thighs on both sides with about 1 teaspoon of the salt.
Make sure some salt gets on the skin and some on the meat side.
Let the thighs sit on the counter for 15 to 20 minutes if you can.
This helps the salt work in and helps the chicken cook more evenly. - Set up the panPlace a heavy pan on the stove. Cast iron works great for this.
Add the tallow or other animal fat to the pan.
Put the chicken thighs in the cool pan, skin side down.
This slow start lets the fat under the skin melt and turn crisp. - Start the heatTurn the heat to medium low.
As the pan warms, you will hear a soft sizzle.
Do not move the chicken. Let the skin stay flat on the pan.
If a corner curls up, press it down gently with a spatula. - Render and crisp the skinCook the thighs skin side down for about 12 to 15 minutes.
The fat will slowly render and pool in the pan.
The skin should turn deep golden and feel firm when you tap it.
If the skin is getting dark too fast, lower the heat. - Manage the fat in the panWhen there is a lot of fat in the pan, tilt the pan and spoon some into a heat safe bowl.
Save this fat. You can use it later for eggs or another round of chicken.
Leave enough in the pan to coat the bottom. - Flip the chickenWhen the skin is crisp and deep gold, flip the thighs so the meat side is down.
Cook on medium heat for about 5 minutes.
This starts to cook the thicker meat near the bone. - Add the butter and basteAdd the 3 tablespoons of butter to the pan.
As it melts and starts to foam, tilt the pan slightly.
Use a spoon to scoop the hot butter and pan fat.
Spoon it over the top of the thighs again and again.
Keep basting for 5 to 7 minutes.
The butter should smell nutty and rich, not burned.
If it starts to turn very dark or smell sharp, lower the heat. - Check for donenessThe meat should pull back a bit from the bone.
Juices should run clear when you poke near the bone with a knife tip.
If you use a thermometer, aim for 175 degrees on the thickest part.
Thighs like a higher temp than breast. That is why they stay soft and juicy. - Rest and serveTurn off the heat.
Move the thighs to a plate and let them rest for 5 minutes.
Stir the last tablespoon of butter into the hot pan juices.
Spoon this over the chicken when you serve.
Sprinkle with the last half teaspoon of salt, to taste.
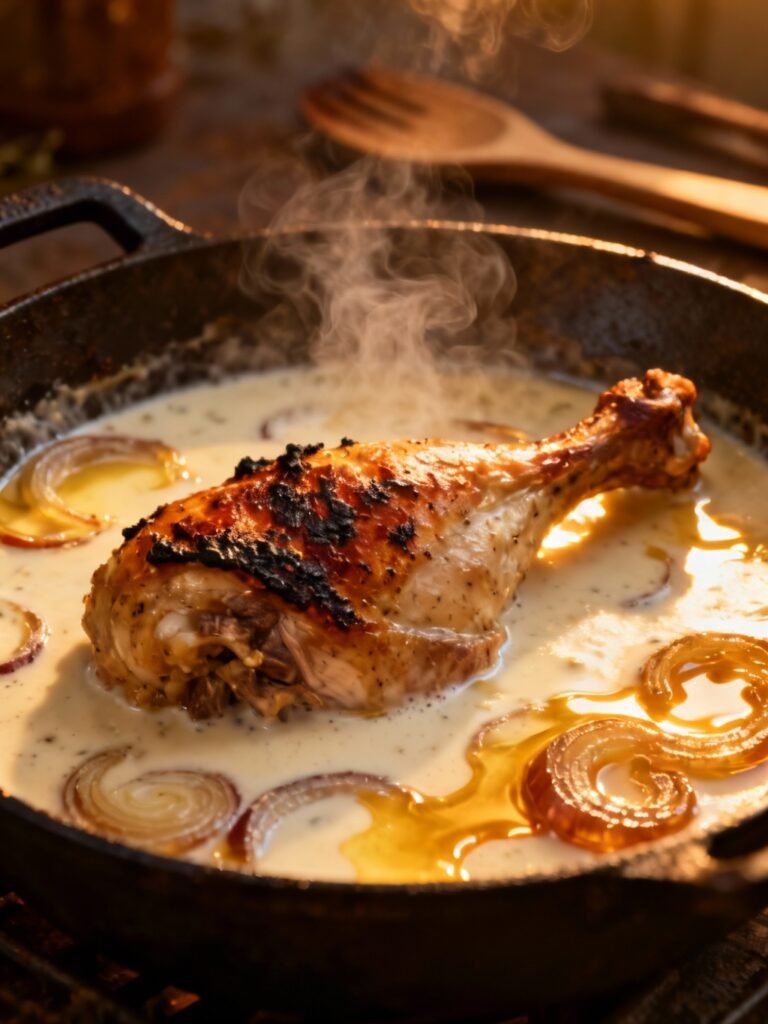
You now have crispy skin chicken thighs basted in butter with a glossy, rich pan sauce that took almost no thought.
Why These Crispy Skin Chicken Thighs Basted in Butter Work So Well
This method looks simple, but it hits a few key points that make it work every time.
First, chicken thighs are very friendly to cook. They have more fat and dark meat, so they stay tender even if you go a little past your target time. Great for nights when you are a bit distracted.
Second, starting the chicken in a cool pan, skin side down, gives the fat under the skin time to melt. The skin slowly dries out and turns crisp instead of shrinking and going rubbery. Most sad chicken skin comes from heat that is too high at the start.
Third, the butter baste does two jobs. It coats the meat to keep the surface moist, and it brings deep flavor as the milk solids in the butter brown. You are almost frying and glazing at the same time.
Last, the short rest at the end lets the juices settle back into the meat. If you cut right away, more juice will spill on the board instead of staying in the thigh. I know it is hard to wait, but it is worth it.
Choosing the Right Cut
Not all chicken thighs are the same. Some make this recipe shine more than others.
Look for these traits:
- Skin on, bone in thighs
The skin is the star here, and the bone helps keep the meat juicy. - Medium size pieces
About 6 to 8 ounces each is a sweet spot.
Very small thighs can dry out. Very huge ones take longer and may need a bit more time on low heat. - Even, full skin coverage
Try to pick packs where the skin fully covers the top of the thigh.
Loose flaps are fine, but big bare patches will not crisp in the same way. - Fresh, not pumped
If the label says it has added broth or a lot of sodium, it may steam more and splatter more.
Simple chicken with no extra liquid gives the best crust.
If all you have is boneless skin on thighs, you can still use this method. Just watch the time, since they cook faster. If you only have boneless skinless, this recipe will still taste good, but you lose that magic crackling skin.
Cooking Tips and Common Mistakes
Here are some quick tips from many rounds of making this in my own kitchen.
Do this
- Dry the skin well
Water is the enemy of crisp skin. Paper towels are your friend. - Salt ahead if you can
Even 20 minutes helps the salt go deeper and helps the skin dry. - Adjust heat, do not fear it
If things look pale, go a bit higher. If things look too dark, go lower.
You control the stove, not the other way around. - Baste often near the end
Keep the spoon moving. The steady flow of hot butter is what brings that deep color and flavor.
Do not do this
- Do not start in a very hot pan
The skin will seize and shrink before it can render. You get tough skin and a thick layer of fat under it. - Do not flip early
Leave the thighs skin side down long enough to get that deep gold color. If you peek, lift just a corner. - Do not walk away for long
This is still fast, high reward cooking. Stay close so you can tweak the heat and watch the color. - Do not crowd the pan
If the thighs are jammed tight, they will steam and the skin will not crisp. Use two pans or cook in batches if needed.
Variations and Serving Ideas
This recipe is very simple, but you can tweak it while still staying in the carnivore lane.
Change the fat
- Use ghee instead of butter if you want less milk solids.
- Use duck fat or chicken schmaltz to start the pan for even more poultry flavor.
- Add a spoon of the saved rendered fat to eggs the next morning.
Play with the finish
- Grate a bit of aged hard cheese over the hot thighs for a rich salty top.
- Serve with soft scrambled eggs cooked in the same pan fat.
- Add a side of seared beef liver if you like to stack your nutrients in one meal.
If you eat more animal based instead of strict carnivore, you can dust the thighs with a touch of garlic powder or smoked paprika along with the salt. Just know that this moves it out of the pure animal only lane.
As for when to serve this, I like it as:
- A quick weeknight dinner with eggs on the side
- A meal prep base that you slice and store for the next day
- A simple company meal when you want something that looks impressive but is hard to mess up
Storage and Reheating
If you somehow end up with leftovers, they keep well.
In the fridge
- Let the thighs cool to room temp.
- Store in a glass box or other sealed box for up to 3 days.
- Keep some of the pan fat with them so they stay moist.
In the freezer
- Wrap each thigh in parchment, then place in a bag or box.
- Label and freeze for up to 2 months.
- Thaw in the fridge overnight before reheating.
Reheating tips
- For the crispest skin, reheat in a pan.
Place the thigh skin side down in a cool pan.
Turn heat to medium low and warm slowly until the skin is crisp again and the meat is hot.
Spoon any melted fat over the top. - You can also use the oven.
Place thighs on a rack over a tray, skin side up.
Bake at 350 degrees for about 10 to 12 minutes, until hot and the skin has some snap again.
I try not to use the microwave for this one. It makes the skin soft. If you have to use it, do short bursts and then toss the thigh in a hot pan for a minute to bring some life back to the skin.
Final Thoughts
These crispy skin chicken thighs basted in butter are one of those rare dishes that feel special but ask very little from you. A short list of animal based ingredients, one pan, and a bit of attention give you a rich meal that fits the carnivore way with zero fuss.
Next time you stare at a pack of chicken and feel bored, try this method. Let the skin do its thing, let the butter do its magic, and let the pan do the work.
Pull out a pan, grab some thighs, and make this tonight. Your future self at the dinner table will be very glad you did.